Users can quickly process the automatic conversion of Excel files into applications in the form.
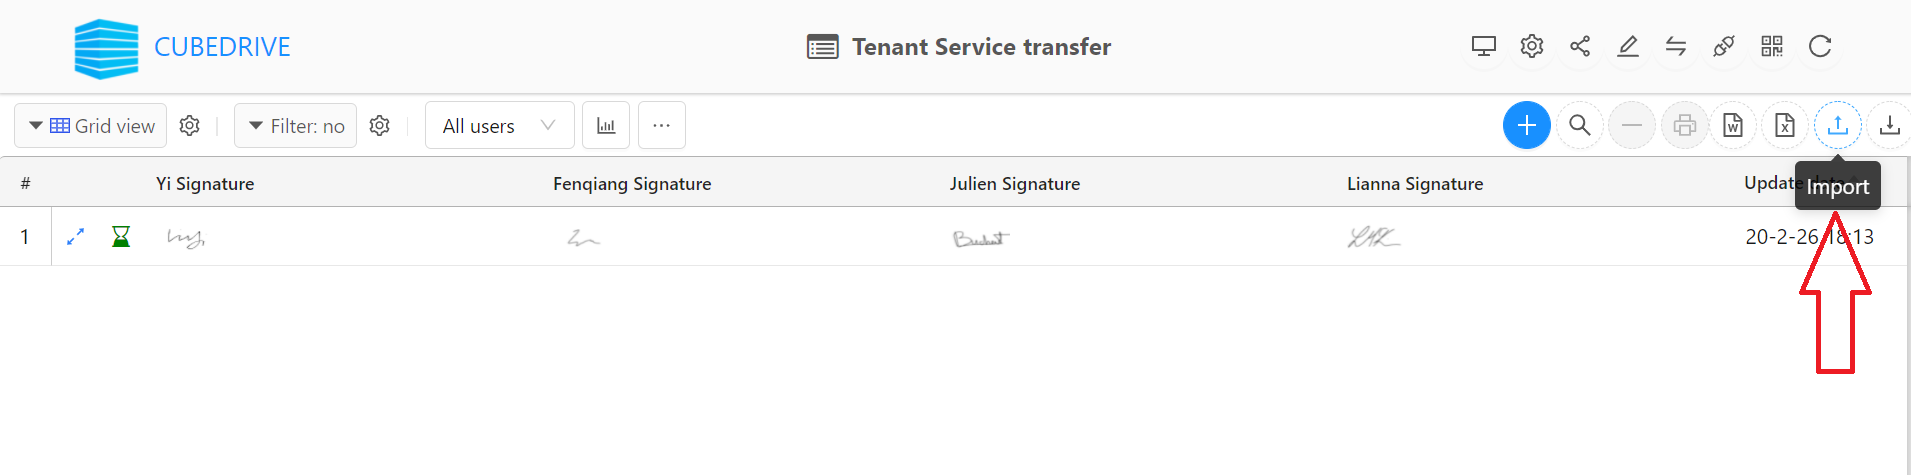
Click Import icon from menu bar, users can upload Excel, create forms and import data.
Each tab in the Excel need to have a list of titles, this title is automatically mapped to the form field title.

Users can process the following setting:
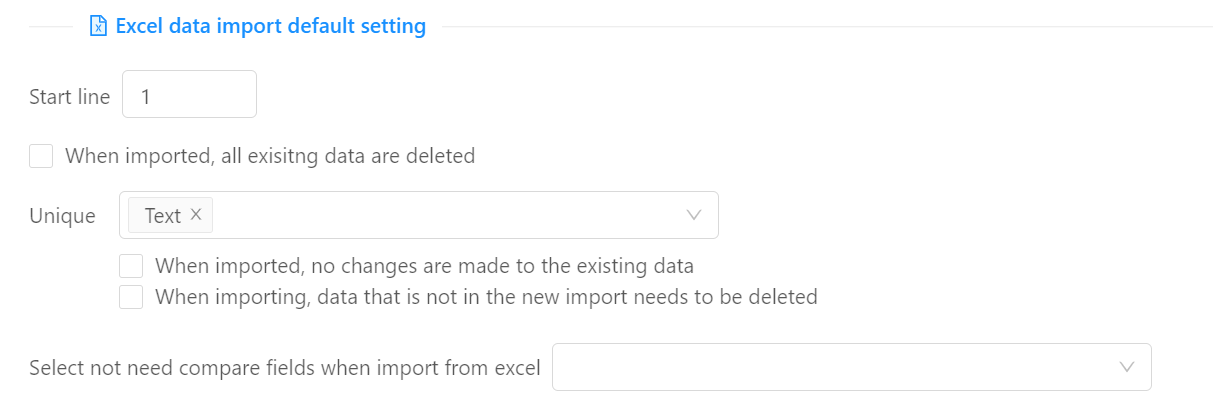
When importing an Excel file, the users can select the preset line of each tab in the Excel file to start parsing the data (the default is the first row).
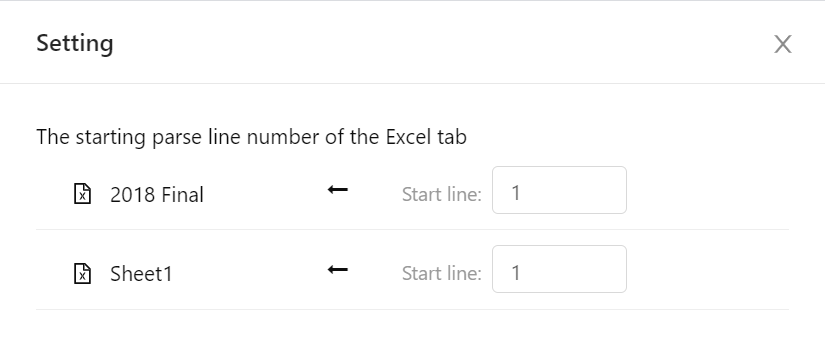 Tip: after the form is automatically generated, the parsed line will be automatically saved for the next import.
Forms will be created with the name and header of each tab in Excel, except that the form with the same name exists.
Tip: there have a list of mapped form with permission for user to select.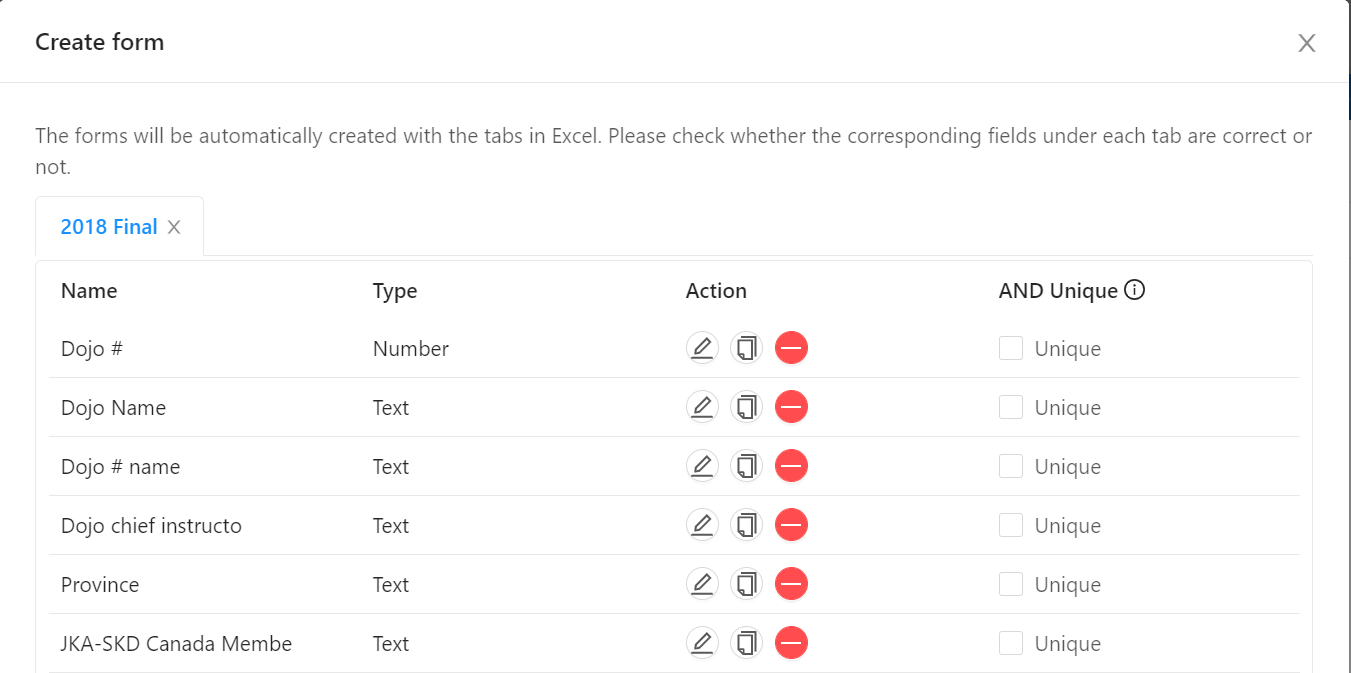
After importing into Excel, a folder is generated in the file management. The folder name is the same as the Excel file name. Users can find the forms with the same name as tabs in the Excel file under this folder.
Tip: users can drag and drop to achieve the map for the file and form.In the form setting, users can process one setting for import record. If checked, only the records meet the custom rule will be imported.
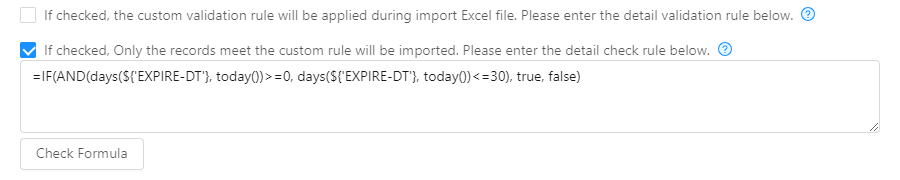 Tip: =IF(AND(days(${'EXPIRE-DT'}, today())>=0, days(${'EXPIRE-DT'}, today())<=30), true, false)
In the form setting, users can process more for the import Excel file.